Chapter 3: Templates
In a typical web application, visiting a URL returns an HTML page containing various kinds of information. Because our application is dynamic, some of that information needs to change depending on the situation. For example, a page might display different information to users who are signed in and those who are not. The application therefore needs to generate the page dynamically when someone visits it.
We call HTML or other text containing variables and logic a template. The process of substituting values for those variables and evaluating the logic is called rendering. In this chapter, we will use the Jinja2 template engine to do that work.
By default, Flask looks for templates in a templates folder alongside the module that contains the application instance. Our application is currently in app.py in the project root, so create the folder there:
$ mkdir templates
The directory structure now looks like this:
watchlist/
├── templates/
├── app.py
├── .env
├── .flaskenv
└── .gitignore
Basic template syntax
On a social networking site, each user has a profile page. With Jinja2, we can write one template to use for everyone's profile:
<h1>{{ username }}'s profile</h1>
{% if bio %}
    <p>{{ bio }}</p>  {# Indentation is for readability here; it is not required. #}
{% else %}
    <p>No bio provided.</p>
{% endif %}  {# Most Jinja statements need an explicit closing tag. #}
Jinja2's syntax is broadly similar to Python's. You will learn common ways to use it as we go. In a template, special delimiters mark Jinja2 variables and statements. These are the three you will use most often:
{{ ... }}marks a variable.{% ... %}marks a statement, such asiforfor.{# ... #}marks a comment.
You need to pass the variables used in a template when you render it. We will see how shortly.
Write the home page template
Create index.html in the templates directory for our home page. It needs to display a list of movies and some personal information:
templates/index.html: the home page template
<!DOCTYPE html>
<html lang="en">
<head>
<meta charset="utf-8">
<title>{{ name }}'s Watchlist</title>
</head>
<body>
<h2>{{ name }}'s Watchlist</h2>
{# Use the length filter to get the length of movies. #}
<p>{{ movies|length }} Titles</p>
<ul>
{% for movie in movies %} {# Iterate over movies. #}
<li>{{ movie.title }} - {{ movie.year }}</li> {# Equivalent to movie['title']. #}
{% endfor %} {# Use endfor to close the for statement. #}
</ul>
<footer>
<small>© 2025 <a href="http://helloflask.com/book/3">HelloFlask</a></small>
</footer>
</body>
</html>
Jinja2 provides filters to make working with variables easier. Their syntax is:
{{ variable|filter }}
The variable is on the left, and the filter's name is on the right. For example, the template above uses the length filter to find the length of movies, much like Python's len() function.
Tip Visit https://jinja.palletsprojects.com/en/3.0.x/templates/#builtin-filters for the full list of available filters.
Prepare sample data
To try rendering the page, we first need some sample data to fill it with:
app.py: define sample data
name = 'Grey Li'
movies = [
    {'title': 'My Neighbor Totoro', 'year': '1988'},
    {'title': 'Dead Poets Society', 'year': '1989'},
    {'title': 'A Perfect World', 'year': '1993'},
    {'title': 'Leon', 'year': '1994'},
    {'title': 'Mahjong', 'year': '1996'},
    {'title': 'Swallowtail Butterfly', 'year': '1996'},
    {'title': 'King of Comedy', 'year': '1999'},
    {'title': 'Devils on the Doorstep', 'year': '1999'},
    {'title': 'WALL-E', 'year': '2008'},
    {'title': 'The Pork of Music', 'year': '2012'},
]
Render the home page template
Use render_template() to render a template. Its required argument is the template's filename, given as a path relative to the templates directory—in this case, 'index.html'. To render it correctly, we also need to pass the variables used inside the template as keyword arguments:
app.py: return the rendered template as the response
from flask import Flask, render_template

# ...

@app.route('/')
def index():
    return render_template('index.html', name=name, movies=movies)
We have renamed the view function from hello to index to better describe its purpose: serving the index, or home page.
In the keyword argument movies=movies, the name on the left is the variable name used in the template, while the value on the right is the actual object to pass in. Here, name is a string and movies is a list. Templates are not limited to these two Python data types: you can also pass tuples, dictionaries, functions, and more.
When called, render_template() processes all the Jinja2 statements in index.html and returns the rendered content. In the resulting page, variables and their delimiters are replaced with actual values. Statements and their delimiters are removed after they are evaluated, and comments are removed too.
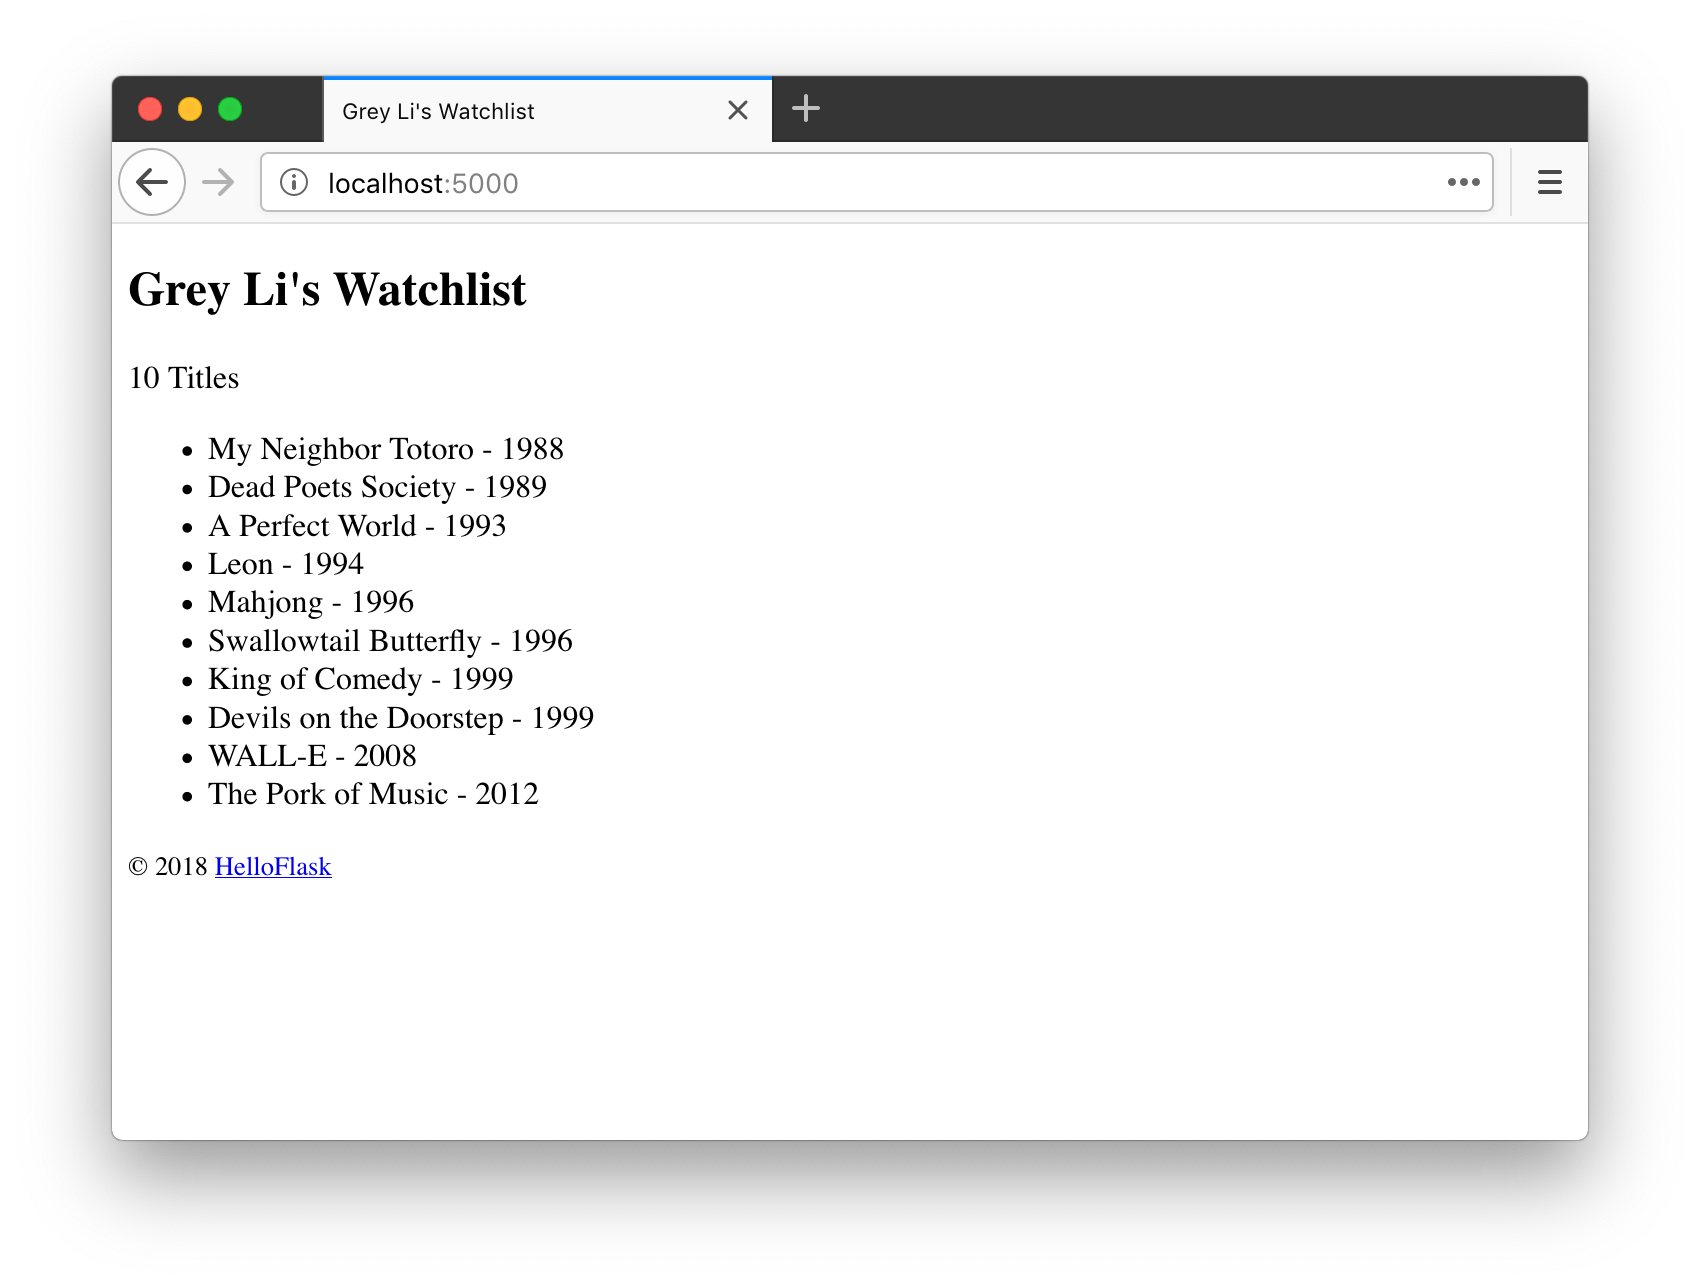
Visit http://localhost:5000/ to see the application's home page:
Chapter summary
In this chapter, we wrote a simple home page template. Before we finish, commit the code:
$ git add .
$ git commit -m "Add the index page template"
$ git push
Going further
- Faker can generate sample data automatically. It supports many kinds of data, including dates and times, names, place names, and random characters.
- In addition to filters, Jinja2 provides tests and global functions for use in templates, as well as more control structures. We will learn some of them later. See the Jinja2 documentation for more.