Chapter 4: Static files
Unlike templates, static files contain content that does not need to be generated dynamically. Examples include images, CSS files, and JavaScript files.
In Flask, we keep static files in a folder named static. It belongs alongside the application module, app.py, and the templates folder, so create it in the project root:
$ mkdir static
The directory structure now looks like this:
watchlist/
├── templates/
├── static/
├── app.py
├── .env
├── .flaskenv
└── .gitignore
Generate URLs for static files
To include a static file in an HTML page, you need its URL. Flask's url_for() function lets you generate these URLs flexibly.
Near the end of chapter 2, we learned how to use url_for(): pass an endpoint, usually the view function's name, and any parameters to get the corresponding URL. For static files, use the endpoint static and pass the file's path relative to the static folder as the filename argument.
Suppose you put foo.jpg directly inside static. Generate its URL like this:
<img src="{{ url_for('static', filename='foo.jpg') }}">
The call inside the braces returns /static/foo.jpg.
Tip In a Python script, you need to import
url_for()fromflask. In a template, you can use it directly because Flask adds several commonly used functions and objects to the template context, the environment available to the template.
Add a favicon
A favicon, short for “favorite icon,” is the small image representing a site in browser tabs and bookmarks. Prepare an image in ICO, PNG, or GIF format, usually 16×16, 32×32, 48×48, or 64×64 pixels. Place it in static and include it in the HTML template like this:
templates/index.html: include the favicon
<head>
    ...
    <link rel="icon" href="{{ url_for('static', filename='favicon.ico') }}">
</head>
Save the file and refresh the page to see the icon in the browser tab.
Add images
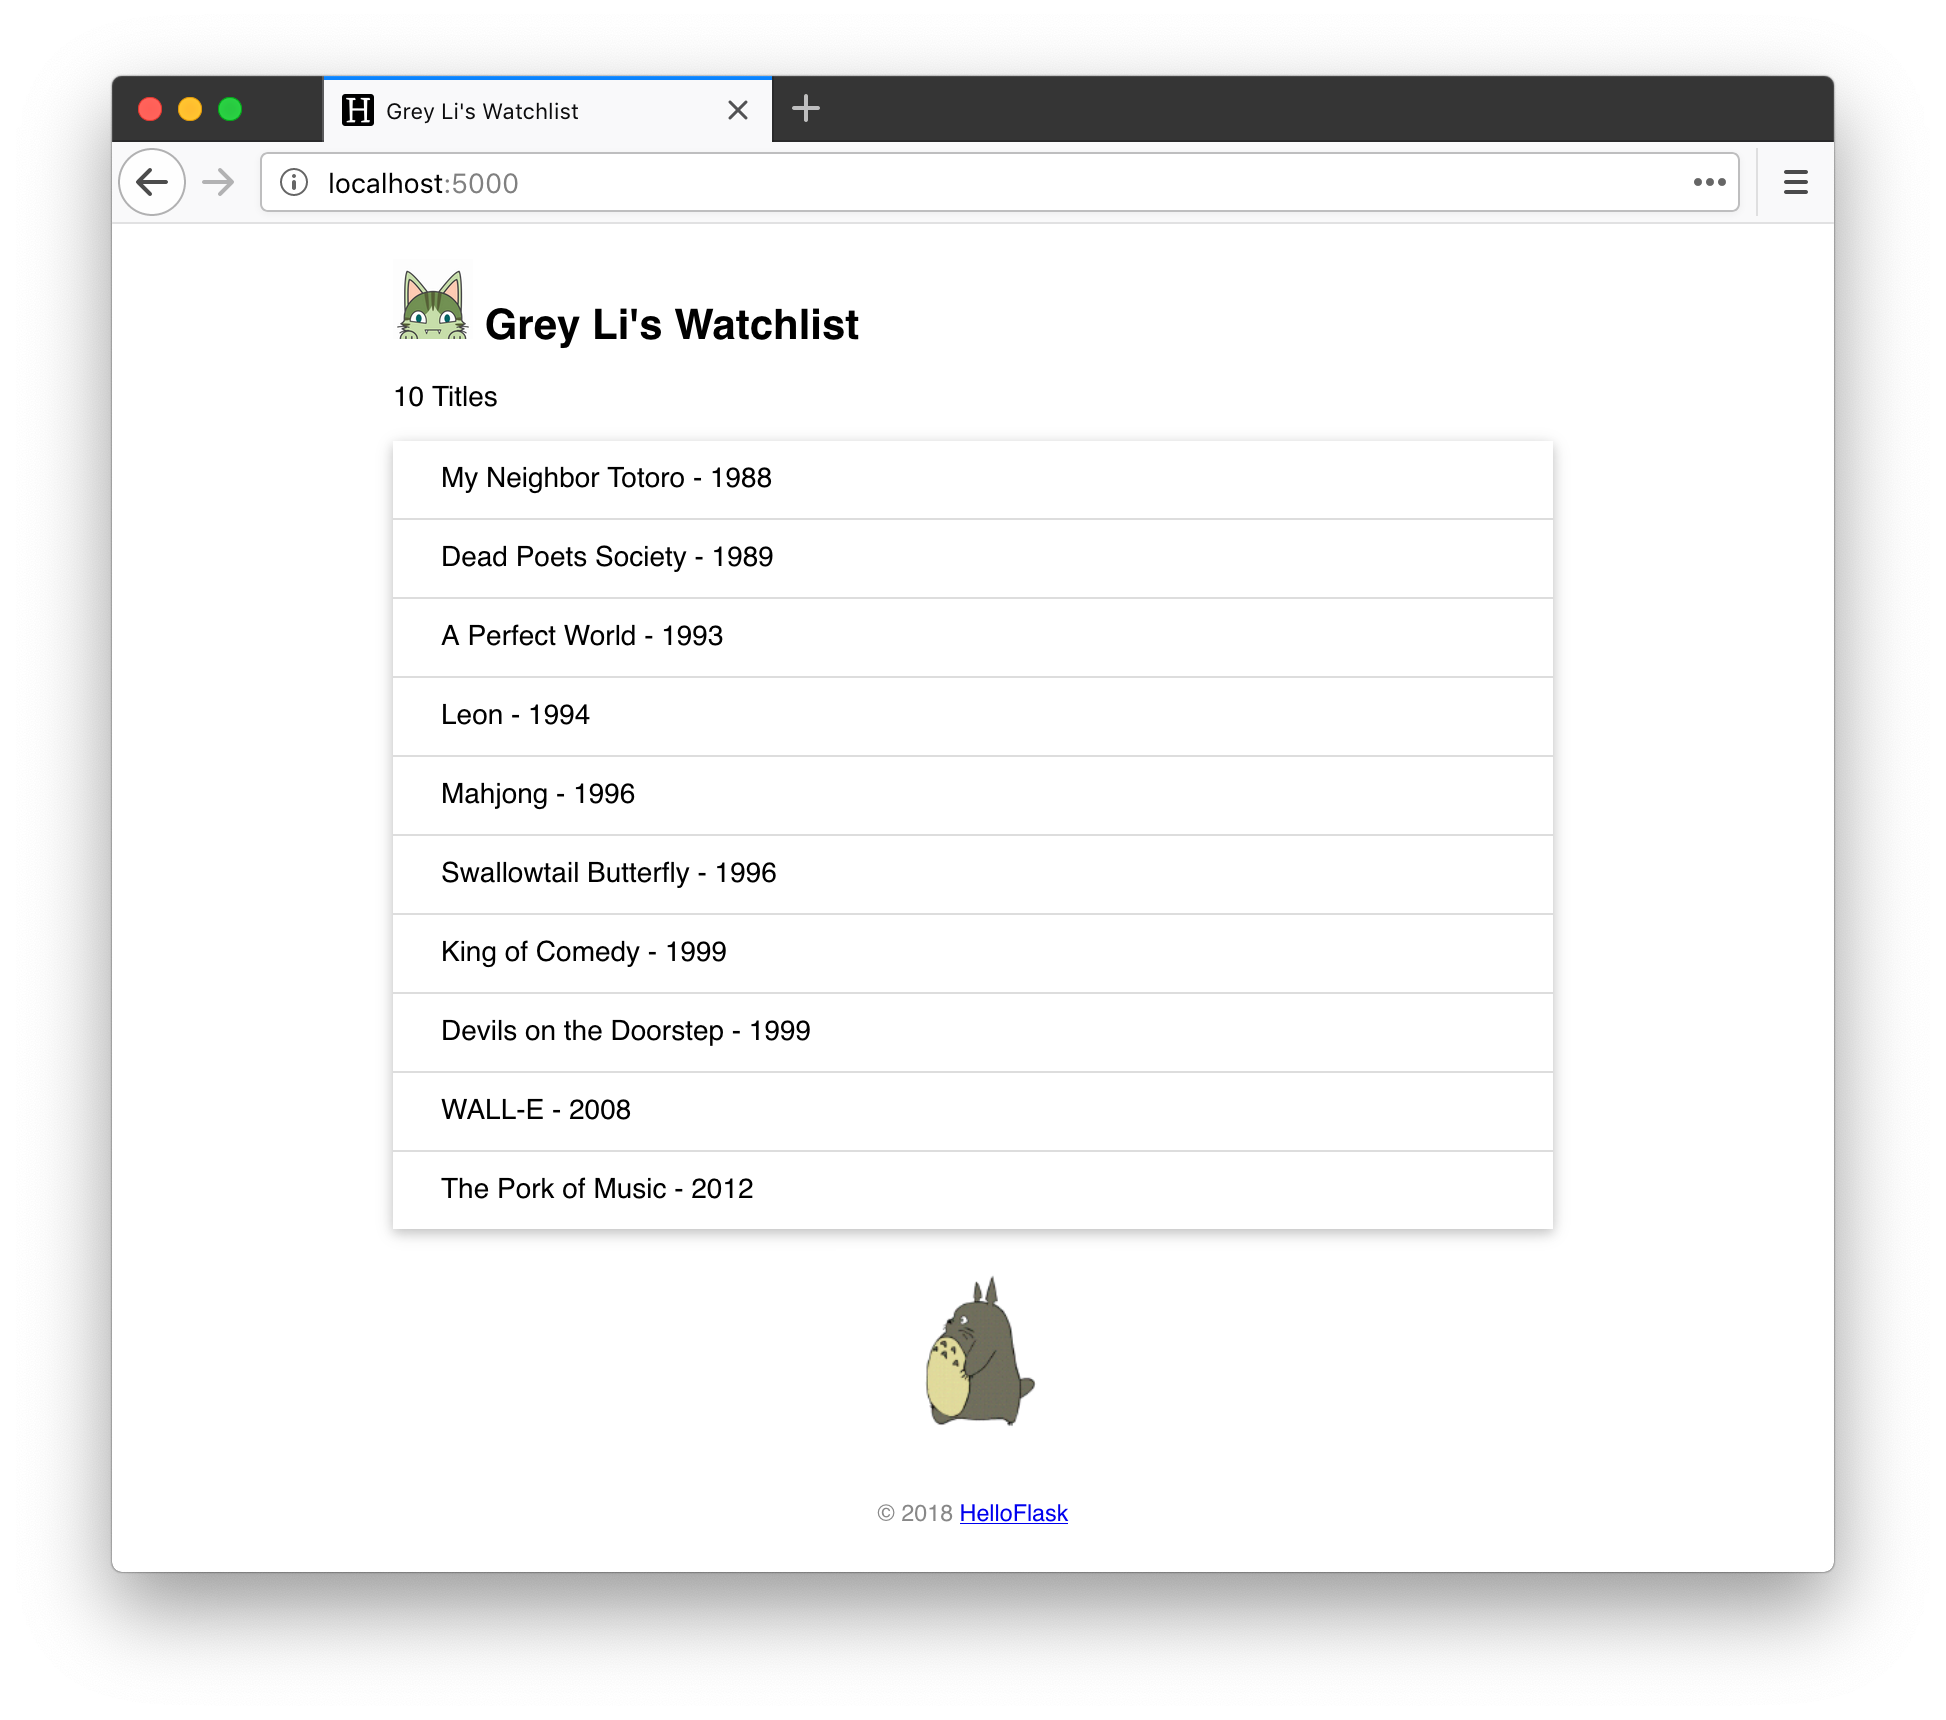
Let's make the page less plain with two images: an avatar beside the page heading and an animated Totoro image at the bottom. Create an images subfolder inside static and place both images there:
$ cd static
$ mkdir images
Return to the project root with cd .. before continuing.
Subfolders are optional; we use one here to keep similar files together. Likewise, if you have several CSS files, you could organize them in a css folder. Now add the two images to the page template, making sure their paths are correct:
templates/index.html: add images
<h2>
    <img alt="Avatar" src="{{ url_for('static', filename='images/avatar.png') }}">
    {{ name }}'s Watchlist
</h2>
...
<img alt="Walking Totoro" src="{{ url_for('static', filename='images/totoro.gif') }}">
Tip You can use any images you like—remember to update the filenames—or download these two from the example application's GitHub repository.
Add CSS
The page still looks rather plain even with the images, because we have not added any CSS rules. Create style.css inside static with the following contents:
static/style.css: define the page styles
/* The page as a whole */
body {
    margin: auto;
    max-width: 580px;
    font-size: 14px;
    font-family: Helvetica, Arial, sans-serif;
}

/* Footer */
footer {
    color: #888;
    margin-top: 15px;
    text-align: center;
    padding: 10px;
}

/* Avatar */
.avatar {
    width: 40px;
}

/* Movie list */
.movie-list {
    list-style-type: none;
    padding: 0;
    margin-bottom: 10px;
    box-shadow: 0 2px 5px 0 rgba(0, 0, 0, 0.16), 0 2px 10px 0 rgba(0, 0, 0, 0.12);
}

.movie-list li {
    padding: 12px 24px;
    border-bottom: 1px solid #ddd;
}

.movie-list li:last-child {
    border-bottom:none;
}

.movie-list li:hover {
    background-color: #f8f9fa;
}

/* Totoro image */
.totoro {
    display: block;
    margin: 0 auto;
    height: 100px;
}
Then include the CSS file inside the page's <head> element:
templates/index.html: include the CSS file
<head>
    ...
    <link rel="stylesheet" href="{{ url_for('static', filename='style.css') }}" type="text/css">
</head>
Tip When CSS is in a separate file, the browser caches it after downloading it. The same applies to other static files, such as JavaScript files. Flask 2.0 and later support reloading updated static files. If you are using an older Flask version, use the following shortcut to refresh without the cached copy whenever you change your CSS:
- Google Chrome (Mac): Command + Shift + R
- Google Chrome (Windows & Linux): Ctrl + F5
- Firefox (Mac): Command + Shift + R
- Firefox (Windows & Linux): Ctrl + F5
- Safari: Command + Option + R
Finally, add class attributes to the relevant elements so that the CSS rules apply to them:
templates/index.html: add class attributes
<h2>
    <img alt="Avatar" class="avatar" src="{{ url_for('static', filename='images/avatar.png') }}">
    {{ name }}'s Watchlist
</h2>
...
<ul class="movie-list">
    ...
</ul>
<img alt="Walking Totoro" class="totoro" src="{{ url_for('static', filename='images/totoro.gif') }}">
The finished page looks like this. Feel free to change the CSS—I have done my best!
Chapter summary
The home page is now taking shape. Next, we will gradually build out the application's features. Before we finish, commit the code:
$ git add .
$ git commit -m "Add static files"
$ git push
Going further
- If you find CSS difficult, try a front-end framework such as Bootstrap, Semantic UI, or Foundation. They provide many ready-made styles and interactive effects that are easy to use.
- The Bootstrap-Flask extension simplifies using Bootstrap in a Flask project.