Chapter 7: Forms
HTML forms let us collect user input. A typical form looks like this:
<form method="post">  <!-- Submit using POST -->
    <label for="name">Name</label>
    <input type="text" name="name" id="name"><br>  <!-- Text input -->
    <label for="occupation">Occupation</label>
    <input type="text" name="occupation" id="occupation"><br>  <!-- Text input -->
    <input type="submit" name="submit" value="Log in">  <!-- Submit button -->
</form>
Keep these points in mind when writing form HTML:
- Set the
<form>element'smethodattribute to POST to submit the data with an HTTP POST request. If you omit it, the default is GET, which places the form data in the URL. This can expose the data and is unsuitable for large submissions. - An
<input>needs anameattribute for its data to be submitted. The server also uses that name to retrieve the corresponding value.
Tip A
<label>does more than display an input's name. Set itsforattribute to the input'sidto associate them. Clicking the label then activates the input, which is especially useful for checkboxes.
Create a movie entry
We could put the form for creating an entry on a separate page or directly on the home page. We will use the home page. First, add a form to its template:
templates/index.html: add a form for new entries
<p>{{ movies|length }} Titles</p>
<form method="post">
    Name <input type="text" name="title" autocomplete="off" required>
    Year <input type="text" name="year" autocomplete="off" required>
    <input class="btn" type="submit" name="submit" value="Add">
</form>
Both inputs set autocomplete to off to disable suggestions from earlier entries. They also have the Boolean attribute required: if someone submits the form without filling them in, the browser displays a built-in error message.
Add these CSS rules for the inputs and submit button:
/* Override the font some browsers apply to input elements */
input[type=submit] {
    font-family: inherit;
}

input[type=text] {
    border: 1px solid #ddd;
}

input[name=year] {
    width: 50px;
}

.btn {
    font-size: 12px;
    padding: 3px 5px;
    text-decoration: none;
    cursor: pointer;
    background-color: white;
    color: black;
    border: 1px solid #555555;
    border-radius: 5px;
}

.btn:hover {
    text-decoration: none;
    background-color: black;
    color: white;
    border: 1px solid black;
}
Next, we need to retrieve the submitted data.
Handle form data
When someone clicks a form's submit button, the browser sends a new request. By default, it goes to the current page's URL; you can set a different destination with the <form> element's action attribute.
Our form uses POST, so entering data and submitting it sends a POST request carrying that data to the root URL. At this point, you will see a 405 “Method Not Allowed” error, because the index view only handles GET requests by default.
Tip GET and POST are two of the most common HTTP methods. GET retrieves a resource, while POST is used to create or update resources. Visiting a link sends a GET request; submitting a form usually sends a POST request.
Change the view's route to accept both GET and POST:
@app.route('/', methods=['GET', 'POST'])
The methods keyword argument to app.route() takes a list of HTTP method strings. It controls which methods the view accepts. Here, we add POST alongside the default GET.
The two methods need different handling:
- For GET requests, sent when someone visits the URL or follows a link, return the rendered page.
- For POST requests, sent when someone submits the form, retrieve and save the submitted data.
Use an if statement to distinguish them:
app.py: create movie entries
from sqlalchemy import select
from flask import request, url_for, redirect, flash

# ...

@app.route('/', methods=['GET', 'POST'])
def index():
    if request.method == 'POST':  # Check whether this is a POST request
        # Read the form data
        title = request.form.get('title')  # Use the input field's name attribute
        year = request.form.get('year')
        # Validate the data
        if not title or not year or len(year) > 4 or len(title) > 60:
            flash('Invalid input.')  # Show an error message
            return redirect(url_for('index'))  # Redirect to the home page
        # Save the form data to the database
        movie = Movie(title=title, year=year)  # Create a record
        db.session.add(movie)  # Add it to the database session
        db.session.commit()  # Commit the database session
        flash('Item created.')  # Show a success message
        return redirect(url_for('index'))  # Redirect to the home page

    movies = db.session.execute(select(Movie)).scalars().all()
    return render_template('index.html', movies=movies)
The form-handling code inside the if introduces three new concepts. Let's look at them one by one.
The request object
Flask makes information about the incoming request available through request. Import it from flask:
from flask import request
It is available while a request is being handled, which is why we use it inside view functions. It contains information such as the request path (request.path), method (request.method), form data (request.form), and query string parameters (request.args).
In our if statement, we check request.method to identify the request method, then read the form data from request.form. This is a special dictionary: use each field's name attribute to retrieve its submitted value:
if request.method == 'POST':
    title = request.form.get('title', '').strip()
    year = request.form.get('year', '').strip()
Calling strip() removes leading and trailing whitespace. The empty-string default lets a missing field go through validation instead of causing an error when .strip() is called.
Flash messages
After a user performs an action, we usually want to display a message. One way is to define a message variable in the view, pass it to the template, and render it there. This is such a common need that Flask provides built-in functions: flash() queues a message in the view, and get_flashed_messages() retrieves messages in the template.
First, import flash:
from flask import flash
Then call it in a view with the message you want to display:
flash('Item Created.')
Internally, flash() stores messages in Flask's session object. The session keeps data between requests by signing it and storing it in a browser cookie. Configure the secret key used for signing:
app.config['SECRET_KEY'] = 'dev' # Equivalent to app.secret_key = 'dev'
Tip A simple key is fine during development. For deployment, use a random secret and do not write it directly in the source code. We will cover this in the deployment chapter.
In the base template, base.html, retrieve and display messages with get_flashed_messages():
<!-- Insert above the page heading -->
{% for message in get_flashed_messages() %}
    <div class="alert">{{ message }}</div>
{% endfor %}
<h2>...</h2>
Retrieving the messages also removes them from the session's pending message queue, which is saved back to the cookie. They are displayed for this request rather than appearing again on the next page visit. This temporary display is called message flashing.
The alert class styles each message:
.alert {
    position: relative;
    padding: 7px;
    margin: 7px 0;
    border: 1px solid transparent;
    color: #004085;
    background-color: #cce5ff;
    border-color: #b8daff;
    border-radius: 5px;
}
The browser's required validation is client-side validation and cannot be relied on alone. Validate the data on the server too:
if not title or not year or len(year) != 4 or len(title) > 60:
    flash('Invalid input.')  # Show an error message
    return redirect(url_for('index'))
# ...
flash('Item created.')  # Show a success message
Tip Real applications usually need stricter validation. Libraries such as WTForms can handle this for you.
If a value is empty or its length is invalid, show “Invalid input.” Otherwise, show the success message “Item created.”
Redirect responses
A redirect is a special response that tells the browser to make another request to a new URL. Flask's redirect() creates one for you. Pass the destination URL, for example redirect('http://helloflask.com').
We flash a different message depending on whether validation succeeds, but in either case redirect to the home page. Generate its URL with url_for():
if not title or not year or len(year) != 4 or len(title) > 60:
    flash('Invalid title or year!')
    return redirect(url_for('index'))  # Redirect to the home page
flash('Item created.')
return redirect(url_for('index'))  # Redirect to the home page
Edit a movie entry
Editing works much like creating. First, write a view to display the edit page and handle its form submissions:
app.py: edit movie entries
@app.route('/movie/edit/<int:movie_id>', methods=['GET', 'POST'])
def edit(movie_id):
    movie = db.get_or_404(Movie, movie_id)

    if request.method == 'POST':  # Handle the edit form submission
        title = request.form.get('title', '').strip()
        year = request.form.get('year', '').strip()

        if not title or not year or len(year) != 4 or len(title) > 60:
            flash('Invalid input.')
            return redirect(url_for('edit', movie_id=movie_id))  # Redirect to this item's edit page

        movie.title = title  # Update the title
        movie.year = year  # Update the year
        db.session.commit()  # Commit the database session
        flash('Item updated.')
        return redirect(url_for('index'))  # Redirect to the home page

    return render_template('edit.html', movie=movie)  # Pass the movie being edited
This route has a variable part, as discussed in chapter 2's experiments. In <int:movie_id>, movie_id is the URL variable and int is a converter that turns it into an integer. Supply that value when generating the URL too: url_for('edit', movie_id=2) generates /movie/edit/2.
movie_id is the movie record's primary key. The view uses it to look up the record with get_or_404(), which returns the record or a 404 error response if it does not exist.
Why pass the movie to the template? When editing an entry, the form should start with its existing values. Set the value attribute on each <input> to fill them in. Here is the complete edit page template:
templates/edit.html: the edit page template
{% extends 'base.html' %}

{% block content %}
<h3>Edit item</h3>
<form method="post">
    Name <input type="text" name="title" autocomplete="off" required value="{{ movie.title }}">
    Year <input type="text" name="year" autocomplete="off" required value="{{ movie.year }}">
    <input class="btn" type="submit" name="submit" value="Update">
</form>
{% endblock %}
Finally, add a link beside each movie on the home page to its edit page:
index.html: a link to edit a movie
<span class="float-right">
    <a class="btn" href="{{ url_for('edit', movie_id=movie.id) }}">Edit</a>
    ...
</span>
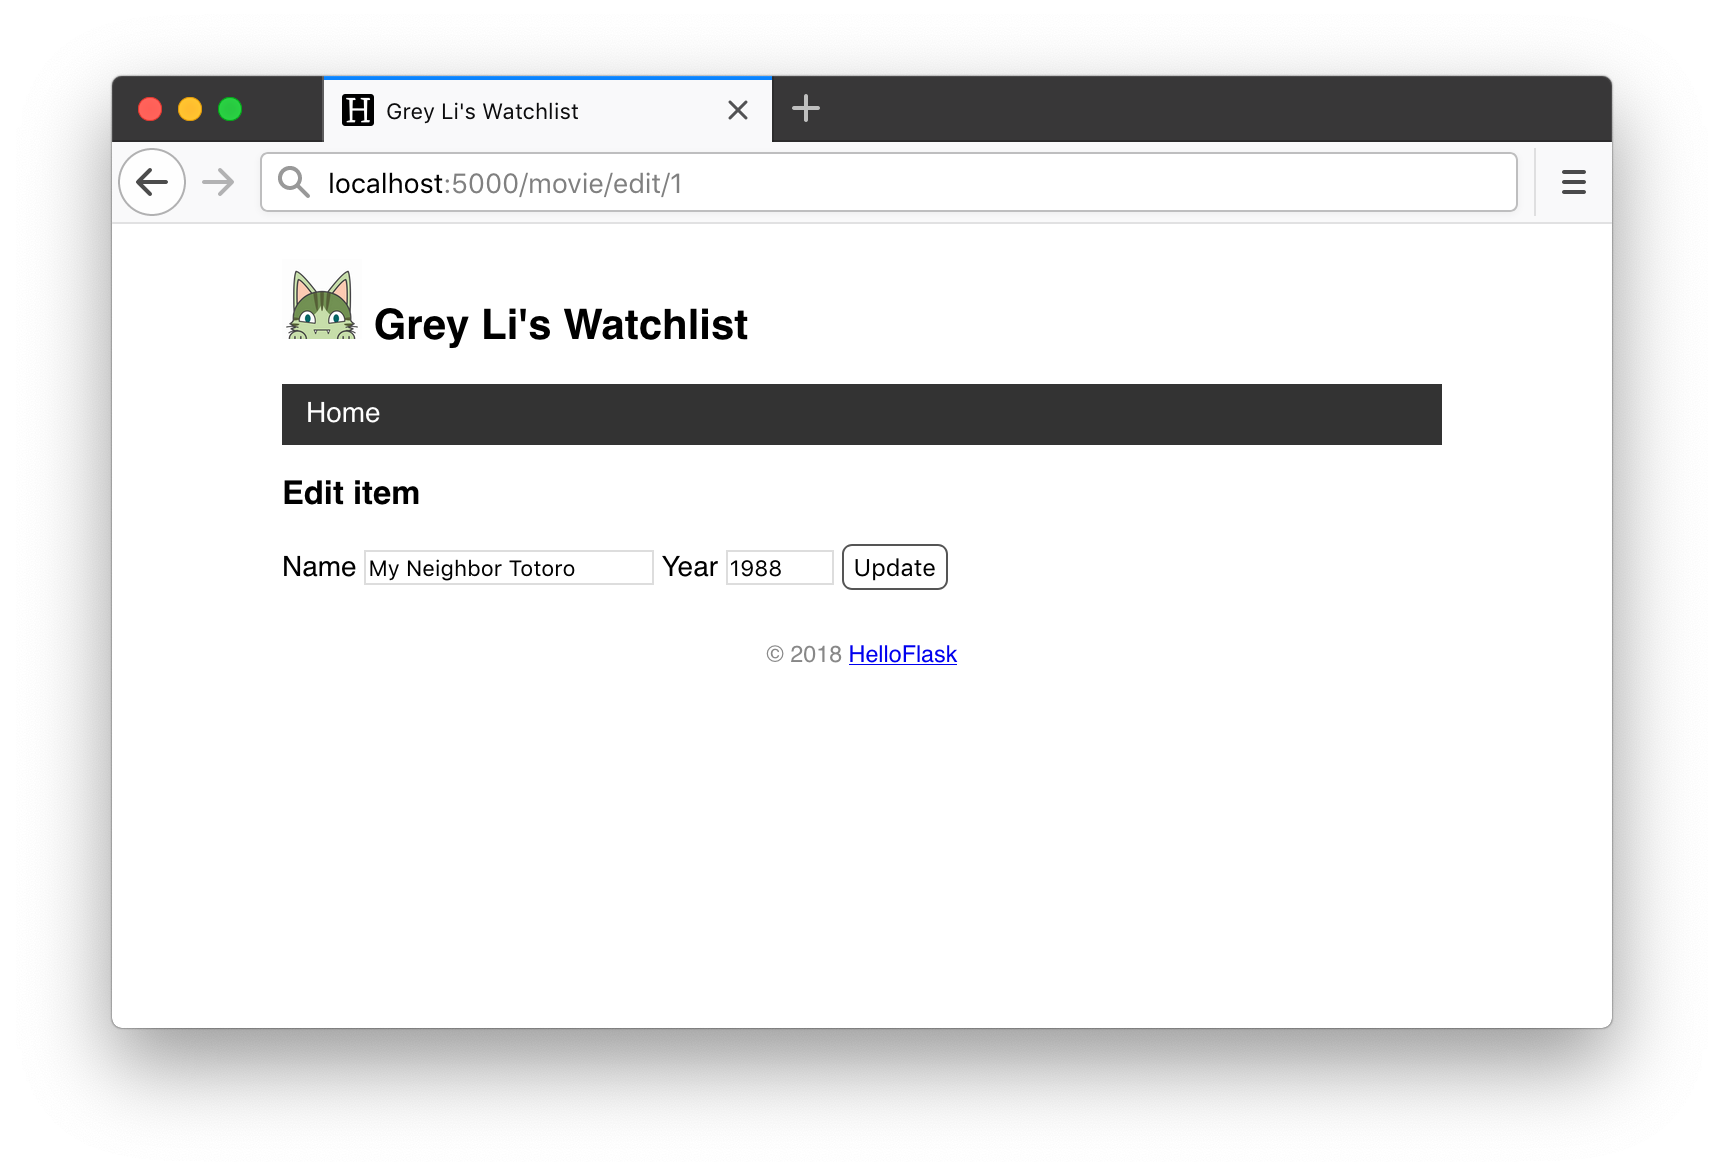
Click an entry's Edit button to open a page like this:
Delete a movie entry
Deleting is simpler because there are no field values to collect. First, create a view that deletes the record:
app.py: delete movie entries
@app.route('/movie/delete/<int:movie_id>', methods=['POST'])  # Accept POST requests only
def delete(movie_id):
    movie = db.get_or_404(Movie, movie_id)  # Get the movie record
    db.session.delete(movie)  # Delete the record
    db.session.commit()  # Commit the database session
    flash('Item deleted.')
    return redirect(url_for('index'))  # Redirect to the home page
Use POST for deletion, through a form rather than a link that sends a GET request:
index.html: the form for deleting a movie
<span class="float-right">
    ...
    <form class="inline-form" method="post" action="{{ url_for('delete', movie_id=movie.id) }}">
        <input class="btn" type="submit" name="delete" value="Delete" onclick="return confirm('Are you sure?')">
    </form>
    ...
</span>
To keep the form's Delete button on the same line as the Edit link, add this CSS:
.inline-form {
    display: inline;
}
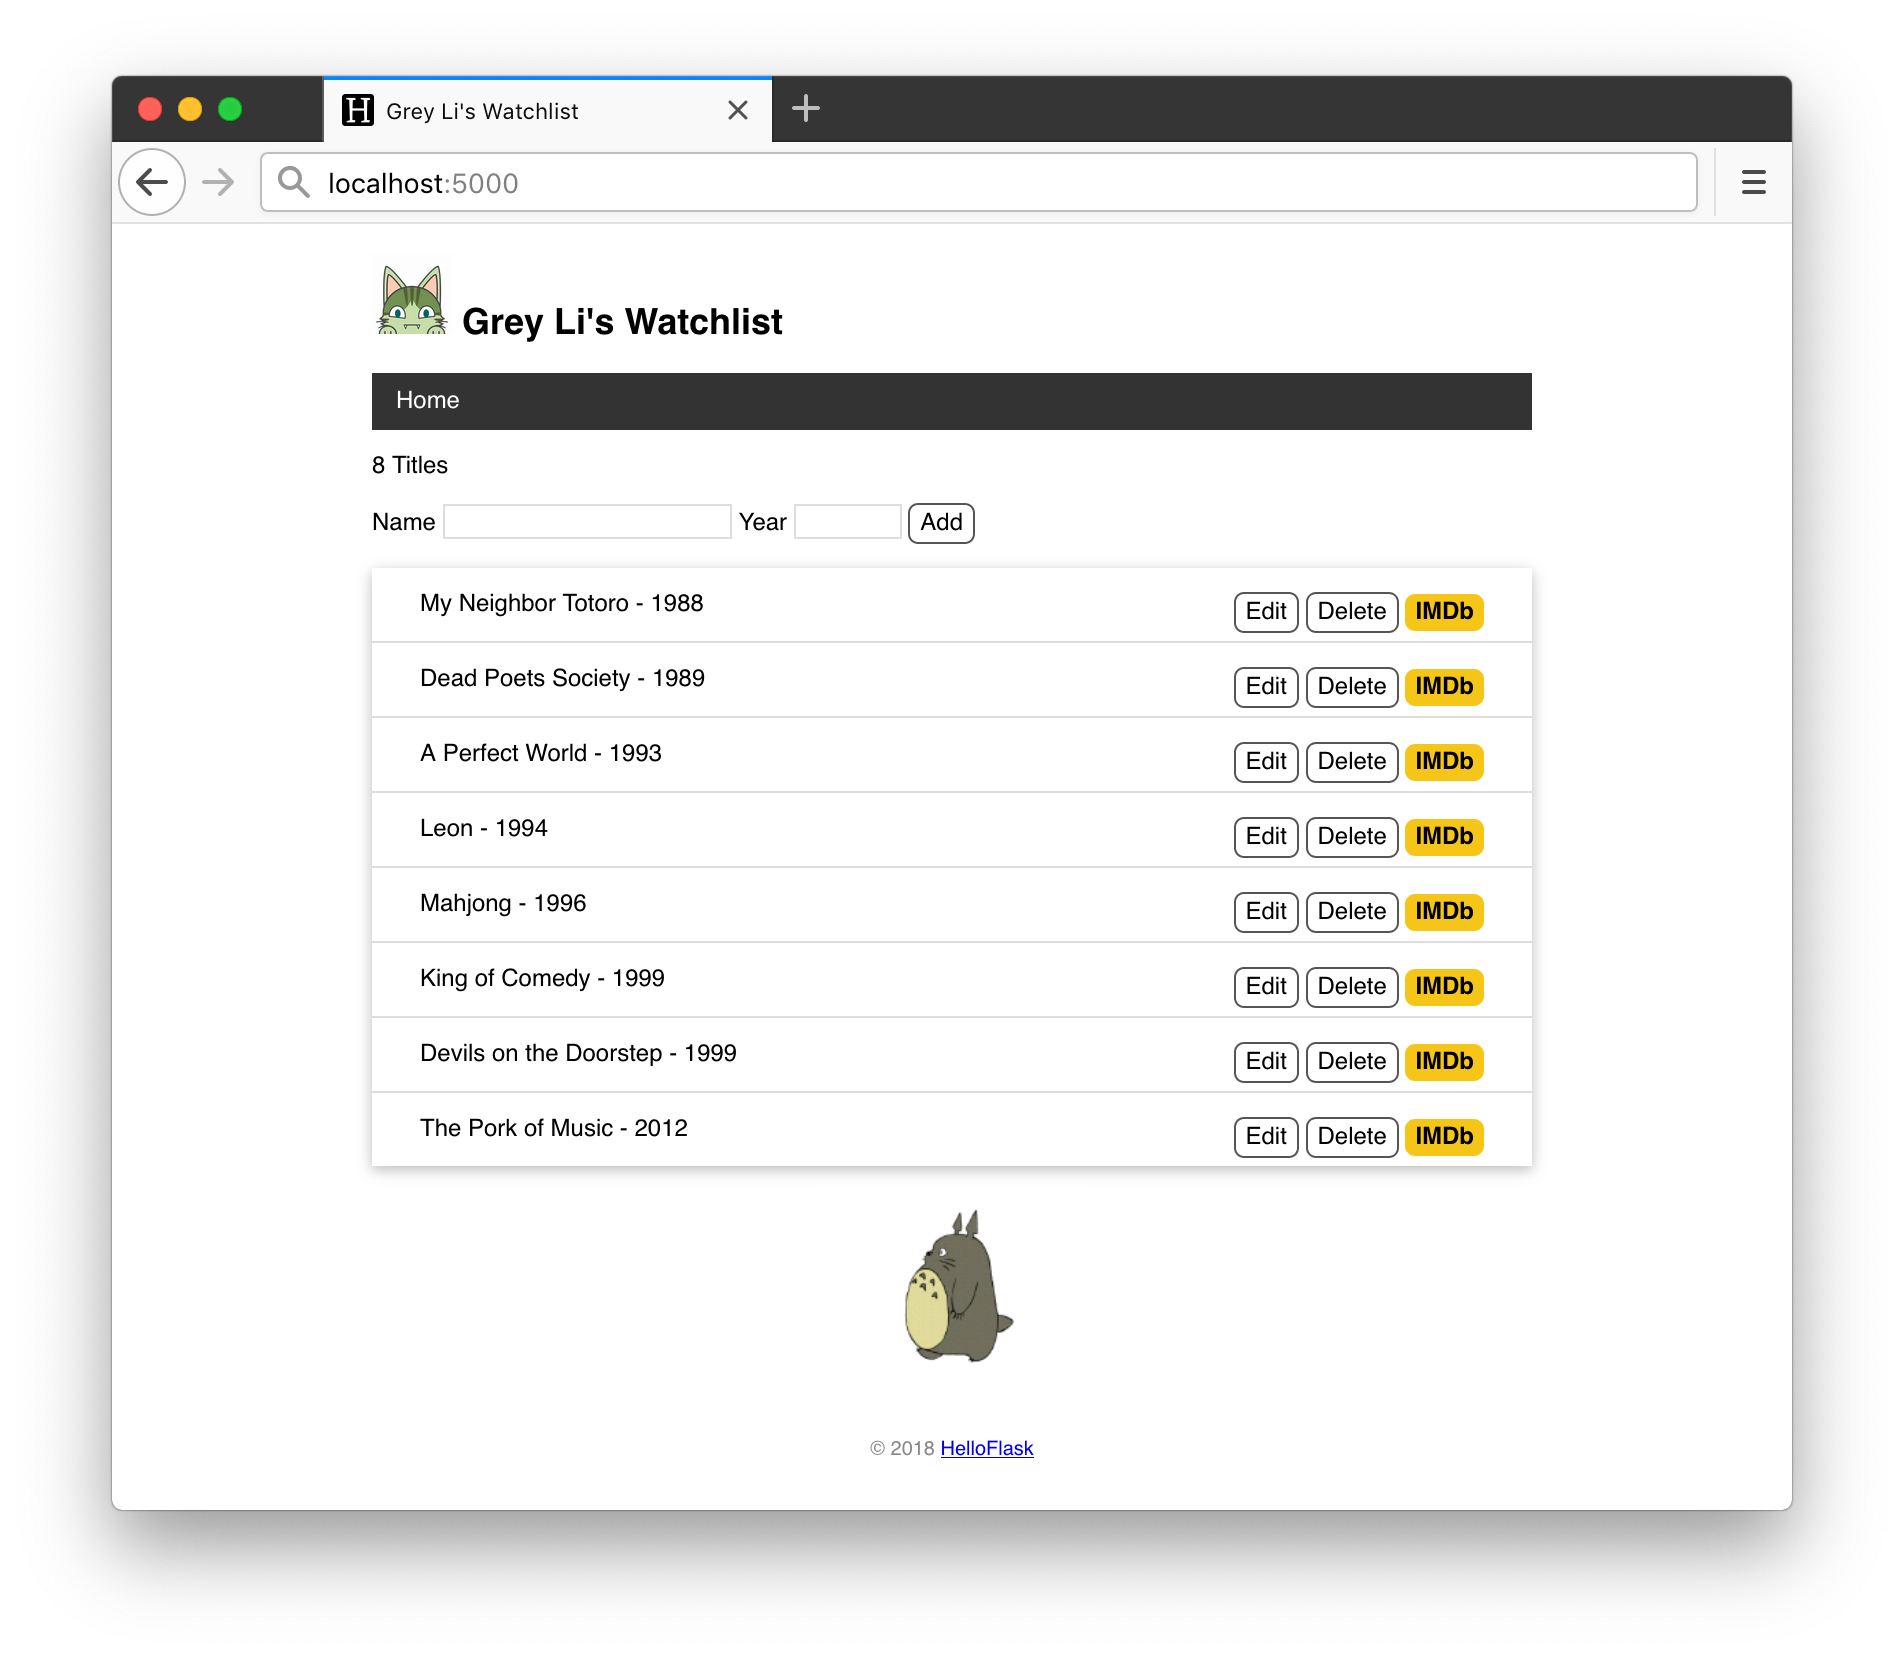
The home page now looks like this:
Chapter summary
In this chapter, we implemented the application's main features: adding, editing, and deleting movie entries. Before we finish, commit the code:
$ git add .
$ git commit -m "Add forms to create, edit and delete items"
$ git push
Going further
- As these examples show, manual form validation is cumbersome and easy to get wrong. For more complex applications, the Flask-WTF extension integrates WTForms to simplify form handling. Define a form class with fields and validators, and it can generate the HTML, validate submissions, and report errors. It also includes protection against CSRF (cross-site request forgery). See the Flask-WTF documentation and the Hello, Flask! column's form articles (Chinese).
- CSRF is a common attack. For example, a malicious site could contain code that sends a POST request to delete a movie in our application when we visit that site. Without CSRF protection, the application cannot tell whether we intended that request. A common defense is to include a random token in a hidden form field and keep a corresponding token in the user's session, carried by a signed cookie. The server checks the submitted token against the stored one. Our example application does not implement CSRF protection; using POST alone does not provide it.
- Forms rendered with Flask-WTF often use similar template code, so you can write macros to render their fields. If you use Bootstrap, Bootstrap-Flask includes form macros to simplify rendering.
- You can move the Delete button's inline JavaScript into an event listener in a separate JavaScript file. As a further step, use JavaScript to handle the click and send the deletion POST request. This would let you use an ordinary
<a>element instead of a form, storing the CSRF token in an element attribute.